MPI Full Garage Lighting System: A Complete Overview
Have you been looking for a way to brighten up your shop, garage, or workspace? Of Course, a Standard 60-watt bulb just doesn't do the trick, and adding light fixtures can require extensive electrical installations. Fortunately, we have a solution that will not only provide you with the perfect amount of lighting but an easy install, and allows you to customize your lighting setup in any building.
The Multi-Point Illumination or MPI is a revolutionary full garage lighting system. It consists of one main LED light fixture that screws into a light socket, surrounded by four additional moveable lights. Equipped with motion sensors, security camera power supply, timers, and 7500 true lumens.
Throughout this article, you’ll also learn the following info about the MPI:
- Different pros of getting the MPI
- How to install the system without professional assistance
- Details about what you can expect from the Multi-Point Illumination
- Comparisons to similar light systems
What Is the MPI - Multi-Point Illumination?
The MPI is the solution to widespread lighting problems. If you have a shop, garage, or another room that needs bright lights, then the MPI can illuminate the entire area.
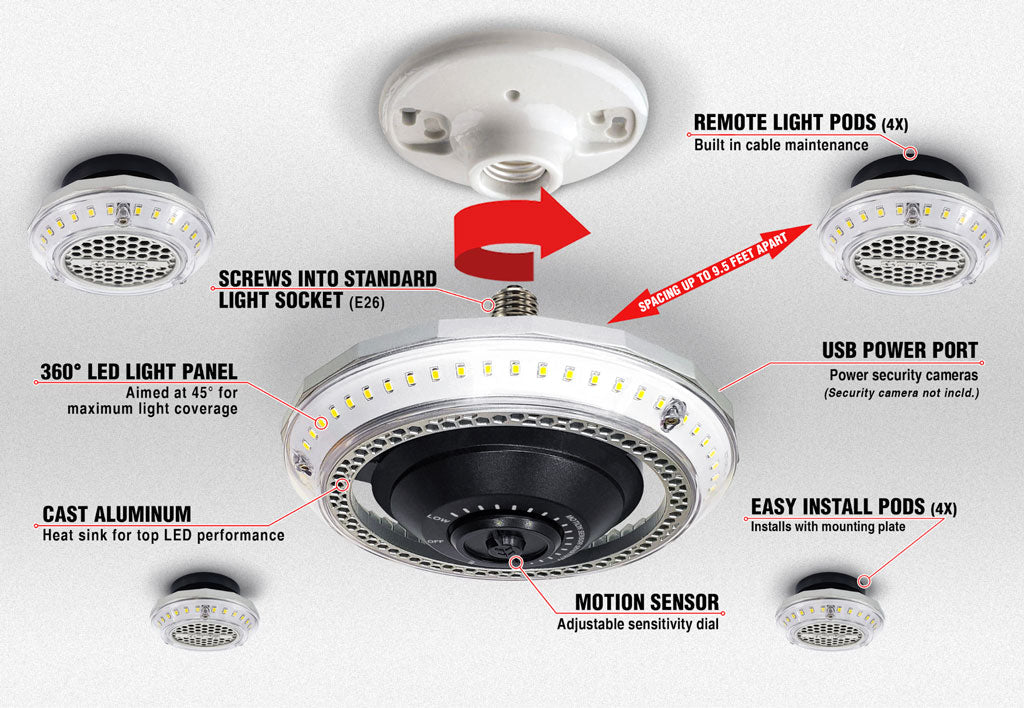
It has five light sources, a built-in cord management system, and mounting brackets for optimal security purposes.
STKR Concepts has developed the Multi-Point Illumination with a motion sensor that can detect when you come near the room. To make it better than most other lights, this sensor can be adjusted using a simple dial.
There are all sorts of unique features that can be found in the MPI, so let’s dive into them below.
What Are the Perks of the MPI?
It’s As Energy-Efficient As It Gets
If you’re tired of paying a massive electric bill to light your shop, the MPI will be a breath of fresh air. Most modern bulbs cost hundreds of watts per hour, whereas this 7500 lumen light fixture only uses about 60 watts per hour. To put that into perspective, it puts out enough light to brighten up a whole shop for 0.6 cents an hour, according to Oasis Energy.
Whether you’re trying to save energy for a lower energy bill or keeping it in mind for the environment, you can feel good about the energy efficiency of the MPI. The lumen to watt ratio blows the doors off pretty much any other bulb, making this model a top choice for those who like to save money while getting loads of brightness. Speaking of which, that leads us to the next perk.
These Lightbulbs Are Incredibly Bright
It’s recommended that shop lights and garage lights range between 3,000 to 8,000 lumens. The Multi-Point Illumination System has a high 7,500 lumens.
The daylight white bulbs put out 5400k which is a cool, revealing brightness that will cover an entire shop or garage. You’ll have no problem seeing the fine details, which are essential when you’re hard at work.
As you set up the bulbs throughout the room, you’ll be able to see how smooth the brightness is. Most other fixtures and traditional bulbs have a strong glow. The light concentrates on one area, casting a shadow in a halo-like shade. In contrast, since MPI has several points of concentration, it doesn’t leave shadows in the room.

You Can Customize the Area of Illumination
Unlike almost any other light system on the market, the MPI has multiple points of light. As mentioned above, you won’t have to deal with ominous shadows that block your view.
The MPI has five total lights. One light screws into a light socket and acts as the main power source, whereas the other four lights can be placed throughout the ceiling (within 9.5’ of the light socket).

Rather than only having one light, multiple lights spending hundreds of watts, or cables throughout the building, you’ll have the best of all; Five lights, one energy-efficient power source, and four wrapped up-tidy cables that don’t take up any space on the ceiling.
No Need for Professional Installation
Basic light bulbs are easy to install; All you have to do is twist them into a socket. However, most light fixtures require extensive rewiring from a professional electrician.
You won’t be able to do it on your own unless you have the necessary tools and experience. In some cases, you could void part of your home’s warranty if you do it by yourself.
However, the MPI only requires that there’s already a light socket in the room. Other than that, you’ll receive the screws and mounting brackets to hold the 4 light pods in place. It’s quite an easy setup, especially because it only requires 2 screws per mini light.

It Has a Built-In Motion Sensor
Another unique perk of this light is that it has a built-in motion sensor. When you walk into the shop, garage, or wherever else you decide to install the light, it can turn on automatically. You also have the option to hook it up to a light switch, but having the motion sensor can be a desirable feature if you get home late in the day.
You also can adjust the sensor to be more or less sensitive. This comes in handy so you can cater to the size of your room. Test it out to see how you like it, then set the timer. You can have the light come on for a couple of minutes or turn off when the motion in the garage stops.
As you can see, this light fixture has all sorts of excellent features that make it a top choice. When you’re ready to bring it home and start setting it up, follow the instructions in the next section.
How to Install the Multi-Point Illumination System
As you probably read earlier in the article, the Multi-Point Illumination system is fairly easy to install. However, it’s highly recommended to break down its simple set-up instructions into a step-by-step process.
Below, you’ll find everything you need to know to get your lights ready to go right when you receive them in the mail.
- Locate a light socket. Find one that is positioned in the center of the room or near the workspace. Most garages have some sort of light socket, but if not, yours may require rewiring. You can also attach the MPI into a portable light socket from a hanging light fixture.
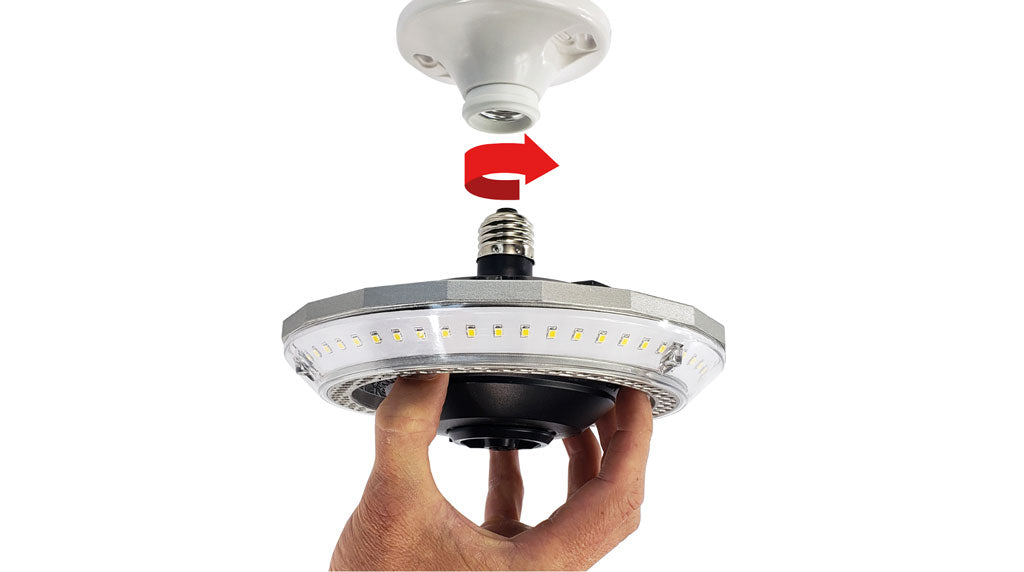
- Twist the MPI into the socket. Once you’ve found the socket that you’re looking forward to, twist the MPI in place. Make sure that you leave enough room for the cables to attach to the unit since there will be four of them. Also, ensure that the fixture is flat against the ceiling rather than cross-threaded or tilted. Avoid over-tightening.
- Measure the distance for the four remaining lights. Before you install the other lights of the fixture, take a carpenter’s pencil and mark the areas. Check how long the cables are, then you’ll know exactly where they can and can’t go. Remember that each pod is a dome light, which means it covers 180 degrees.
- Create pilot holes for the screw. Once you’ve marked all of the spots where the lights are going to be installed, drill pilot holes wherever the screws go. You can check this by lining up the light, marking the holes, removing the light, then drilling the pilot holes. Note: Failure to follow this step can weaken the light’s hold on the ceiling.
- Mount the ceiling plates and anchors. Place the lights over the pilot holes and drill the screws through. You should’ve received anchors that hold the lights in place, preventing damage to the fixture. Keep in mind that only the four mini lights will have screws since the primary light is attached to a light socket.
- Tighten the cables. Now that everything’s securely installed, tighten the cables on all four mini lights. They can twist in place, pulling the cords closer. The base of each mini light has a storage area that holds the spool of cord to keep it out of the way. If you decide to move them further, you can loosen the cable by twisting the lights counter-clockwise.
- Test the lights and motion sensor. Walk-in and out of the room, testing to see how quickly the light comes on. If it’s too sensitive or not sensitive enough, you can change the settings. Also, feel free to test the radius as well. The motion sensor can detect movement up to 20 feet away, so it should cover most of the room.

Adjusting the MPI
Adjusting the length, location, and sensors on the MPI is as easy as it sounds. Although it was briefly covered above, you’ll learn more about the details in depth. If you’re not interested or you’re already knowledgeable about the installation process, then you can head onto the next section about why it’s better than any other ceiling light system on the market.
There are three adjustments you can make, none of which are too difficult. Here they are:
- Adjusting the length of the light entails twist, as mentioned above. If you twist the light’s base to the right, it’ll tighten. You can reduce tangles and keep it snug against the ceiling through this method. If you want to loosen the cords to uninstall, move, or adjust the length, simply twist the base to the left.
- Next, adjust the motion sensor by turning up the sensitivity. The more sensitive it is, the more often the light will turn on. Higher sensitivity also increases the radius that causes the light to turn on. Another option is to hook up the system to a light switch, in which case you could set it to override the sensitivity setting.
- Finally, you can quickly change the location of the four mini lights relatively quickly. All you have to do is unscrew the 2 screws, loosen the cables, and re-mark the new area. There’s no need to rewire anything since all of the lights are powered from the main hub. If you want to move the whole fixture, you’ll have to find a new light socket.
The various adjustments of the Multi-Point Illumination System are some of the biggest reasons that people choose this product. However, there are plenty of other factors that play a role.
To see why so many customers prefer our MPI, read on.
Why Is It Better Than the Competition?
There are hundreds of ceiling light fixtures that can be found on the internet and in stores. What makes the MPI so special? In this section, we’ll discuss why STKR’s MPI is far better than any of its competitors.
It’s Easier to Install Than Any Other Light Fixture
Even the competitors that come close to the energy efficiency can’t manage the same ease of installation. There’s no need to call an electrician, hire a handyman, or ask a friend for help. It’s a one-person job since you’ll receive everything you need for the installation. Furthermore, the entire package weighs less than 3 pounds, so it’s super lightweight.

Another benefit is that in most other fixtures with multiple lights, you have to plug them all in. However, the MPI only needs one socket.
You don’t need to spend tons of electricity, nor do you have to worry about following the sockets and outlets. This placement allows you to get the perfect level of brightness in every room.
The LED Bulb Is Long-Lasting, Brighter, and More Efficient
The LED bulbs in these fixtures are designed to last up to 50,000 hours, which is more than any incandescent or fluorescent bulb in the world. It’s enough to keep your fixture going for several years before you have to get a replacement. You’ll also love the fact that it only uses 60 watts per hour.
Even though they’re super-efficient and long-lasting, these bulbs are also very bright. Producing a whopping 7,500 lumens per MPI set-up.
You’ll easily brighten up your entire mid-sized garage or workshop. In comparison, most incandescent lightbulbs only offer about 800 lumens at 60 watts, so you’d need just over 9 bulbs to reach the same level of brightness. At that point, you would be spending 540 watts per hour which is around the kind of power a refrigerator or clothes washer uses.
Daylight White Bulbs Make It Easy to See Throughout the Night
Just before the turn of the century, incandescent light bulbs were still the goto bulb so at that time it was much easier to overgeneralize and say that outdoor lighting had more of a blue color and indoor lighting had more of a yellow color.
As we figured out more about lighting and how it affects us, the lighting industry started to push for more of a white light to more accurately represent sunlight.
As the name insinuates, the MPI daylight white bulbs are designed to mimic the color of daylight. They’re not supposed to be yellow as if you’re looking at the sun. Instead, they’re the color of the light made by the sunshine. In other words, they’re mostly white.
The issue with most other light sources is that they are either too blue or too yellow. Too much blue light is known to cause headaches and on the other hand, yellow lights cause sleepiness and they don’t brighten up the room enough.
It Can Work With Almost Any Light Switch
Another benefit of the MPI over other light systems is that it can be synced with a light switch or not. You typically can attach a bulb to a socket powered by a switch, but in most cases, it can’t connect with the sensor. If you want it to set up with the switch, then you can set it to override the system.
If you plug a traditional bulb or fixture into a socket or outlet, it’s only adjustable via the light switch. However, this one has the aforementioned adjustment, so the control is in your hands. Use it as a motion light or as a typical light switch-powered fixture.
It Comes With Everything You Need for Installation
Since the MPI comes with everything included, the total price is all you have to pay. You won’t have to go out for additional parts, services, or anything else. It’s an all-inclusive kit that makes it easy to install in less than an hour of receiving it.
For a DIY project like adding a bunch of 4’ shop light ballasts, you would need to figure out how you will hang them, how you will keep the wiring looking professional, and most importantly where you will get power for them. You would have to have specialized skills or a budget for someone who does.
That is one of the biggest features is the MPIs ability to just screw into a bulb socket and share that power with all 5 points of light.
Unique Features of This Light Fixture
You’ve already read most of the reasons why the Multi-Point Illumination system is a top choice, but there are a few other hidden features. Aside from the bright lights and fancy cords, this light fixture has quite a few extra bits and pieces to check out.

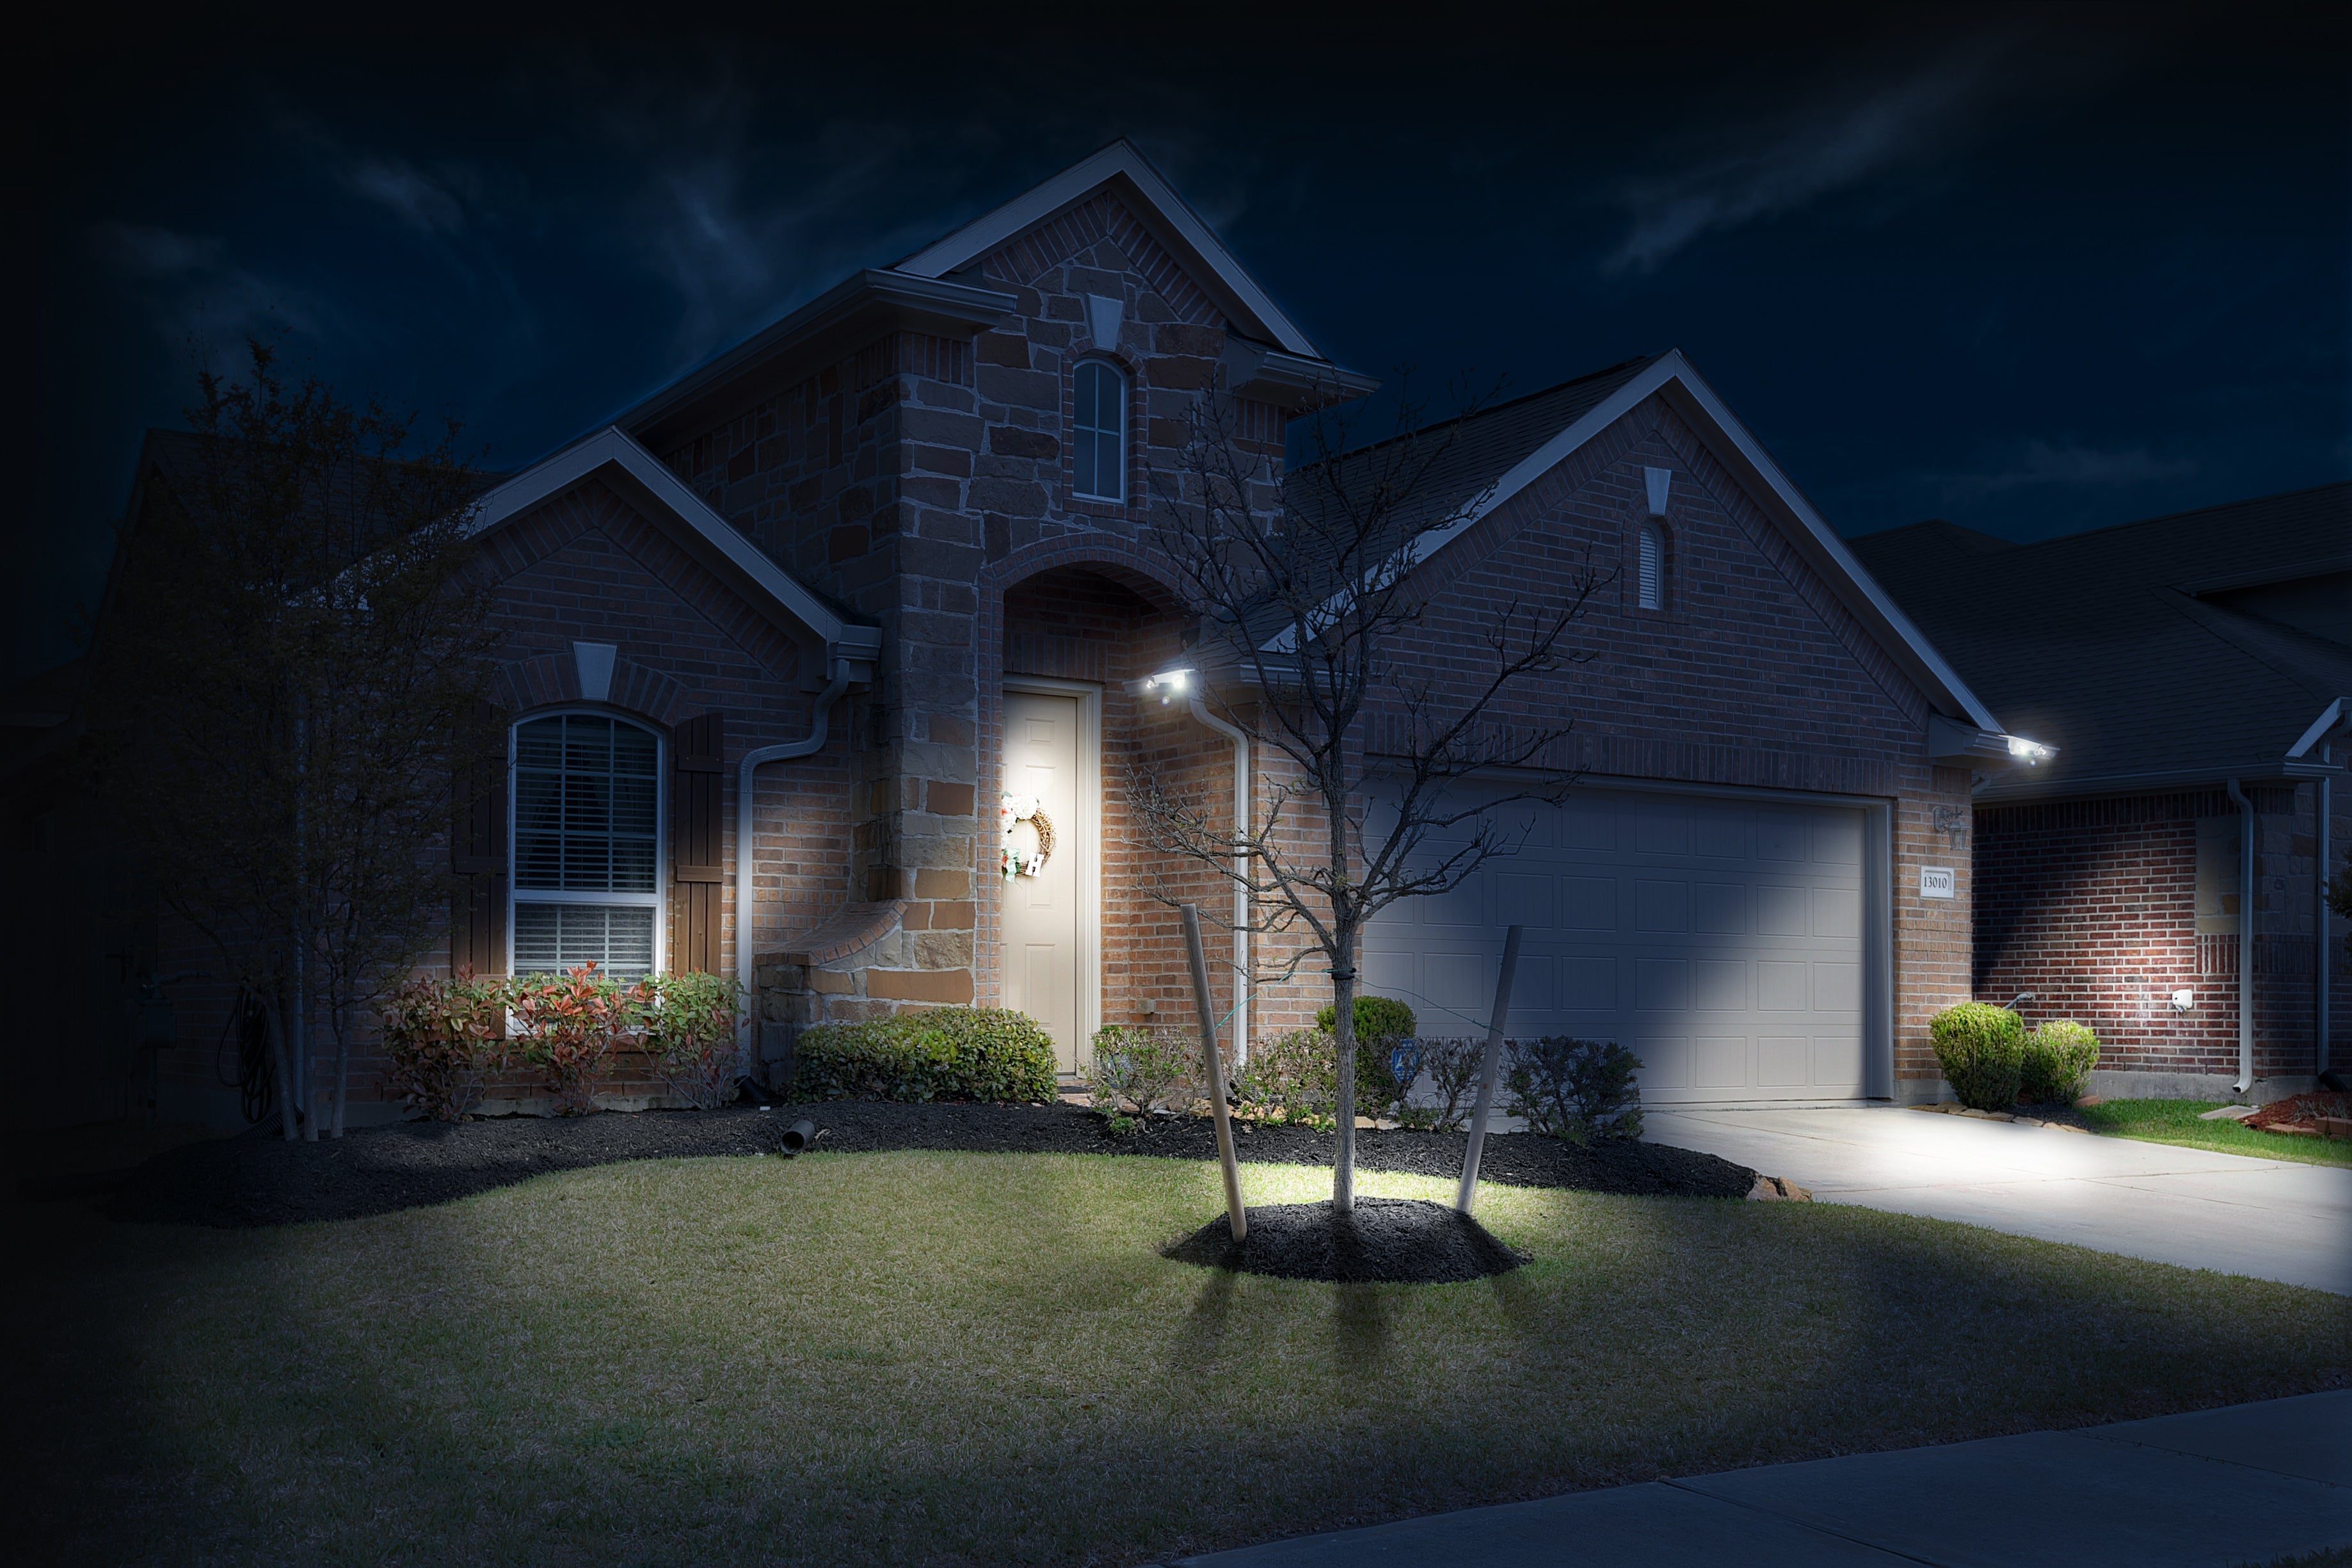
- The MPI has a USB port for security cameras. What other light comes with spots for security cameras, motion sensors, and so on? The MPI is a very unique lighting fixture that is truly one of kind. You can set the motion sensor to turn on, activating the security camera. Not only will the combination give you peace of mind, but it’ll keep people away from your home.
- The pods don’t need an external power source. Almost any other light fixture on the market needs one power source per bulb. If you want five lights, then you’ll have to have five sets of sockets, plugs, or batteries. However, the center hub of the MPI makes it a perfect space-saver.
- The cable management system is unheard of throughout the industry. Another feature that most competitors don’t consider is the cord management system found on the MPI model. We already covered the basics of how it works, but it’s unlike other lights. Dangled and tangled cables often require zip ties or stables.
- It’s made to be bumped, dropped, and scratched. This high-quality-like fixture is as durable as it gets. Although the mounting brackets won’t ever allow the lights to fall from the ceiling, it’s good to know that they won’t break if they hit the ground. Furthermore, it prevents them from being damaged when you’re installing them.
As you can see, these systems are loaded with countless features to brighten up your building. From the multiple lighting arrangements to the USB port for security cameras, you’ll have everything you need to get started.
Where Can You Use the MPI?
There’s no denying the effectiveness of the MPI, but where are you supposed to use it? It’s easy to define this light setup as a Garage Lighting System but that just boxes it into only being able to help in the garage. There are dozens of other applications in which it would come in handy.

Here are a few places and scenarios that you could use the Multi-Point Illumination system:
Shops Can Use Them While Working
If you own a workshop or have one by your house, then the MPI will be a perfect fit. It has more than enough lumens, which is why so many people use it for their shops. If you’re working on vehicles, you’ll need to see all the fine details. These five lights will brighten up every project you get your hands on.
Garages Need Lights for Parking, Tools, etc.
If you’re tired of driving into the back of your garage or losing tools, then the MPI will be a fantastic solution. You can use it to illuminate the whole garage or one specific tight workspace within. Since the pod light positions are adjustable, you can configure the setup in any way that works for your needs.
Sheds With Small Tools and Compartments Could finally Be Illuminated
Owning a decent sized shed and illuminating it by the MPI could be ideal for those who have intricate small tools, backpacking gear, camping gear, and other miscellaneous items. Or maybe you’ve converted a shed into an office or a She-shed then full bright lighting would really impact the space.
Motorhomes With Light Sockets Can Have Upgraded Lights
Another place that you could use these lights is in a large motorhome or toyhauler if you are already running a power inverter. It can be super frustrating to use the dim lights that come stock with the vehicle. However, if you replace one of the lights with the MPI, you can brighten up the entire space. Just keep in mind that you would have to have 110v power in the RV for this idea.
Small Businesses in Offices Often Have Trouble With Desk Work
If you’re renting an office or you own a small business, then the MPI will undoubtedly be the cheap, most effective solution to your lighting troubles and somewhat temporary for when you need it. It brightens up the building with daylight white illumination, which is perfect for long working hours.
Although these are some of the best places to use the MPI, there are dozens of other areas. You could try it in attics, basements, home gyms, and many other areas. The MPI can screw into any E26/E27 lightbulb socket. As long as you have one installed, this light fixture can go just about anywhere that you desire.
What’s Included in This System?
When you get the MPI, you can rest assured that it has everything you need. As mentioned throughout the article, you won’t have to go to the local hardware store or shop online to get all of the mounting hardware. The tools you’ll need are a drill, screwdriver, and pen/pencil, and a ladder to get the job done.

Here’s a list of what’s included when you purchase the MPI:
- One primary hub light that you can screw into any light socket. This unit will be the main source of electricity and the brightest of all of the lights, so make sure you have it positioned in the place that best suits your needs.
- Four pods, also known as mini lights, attach around the ceiling. The cable stretches out just over nine feet, so there are countless configurations that you can come up with. Once you get them in place, tighten the cable management system until the cords are flush with the ceiling and untangled.
- Four ceiling plates, all of which secure the four pods, are also included with the package. In fact, they're built into the back of the pods and are hidden after installation.
- Eight screws are included so that you can secure the ceiling plates. You don’t need to use your spares at home or buy additional screws for the installation process. Note that there might not be extras, so keep an eye on all of them while you’re mounting the plates.
- Eight self-drilling dry wall anchors come with the package, again designed to prevent the lights from falling off the ceiling. These plastic anchors are for installations that don’t fall on a ceiling joist.
- Instructions are included, explaining how you can set the whole system up on your ceiling. They’re a much more in-depth explanation of the aforementioned ‘How-to’ section that was listed at the start of the article. Believe it or not, there’s not much instruction needed since the project is fairly straightforward.
You won’t be left empty-handed when you get the Multi-Point Illumination bundle. Get your tools ready and start drilling!
Conclusion
The MPI is a top-of-the-line lighting system with features that you won’t find anywhere else. Despite its complexity and variety of uses, it’s one of the easiest light fixtures to install. Better yet, it doesn’t require special wiring or professional help, and it only consumes 60 watts per hour.

Here’s a quick recap of the post:
- The MPI consists of five lights; Four pods and one primary hub light.
- The whole system consumes 60 watts and runs off of one light socket.
- Each lightbulb lasts over 50,000 hours of continuous usage.
- It produces 7,500 lumens of daylight white.
- You’ll receive everything you need for the installation process.